
Making The Crust
To prepare the ingredients for making the perfect pie crust without a food processor, you need to focus on the details. With the upcoming sub-sections, selecting the necessary ingredients and measuring accurately, we will show you how to approach this process like a pro.
Selecting the Necessary Ingredients
When planning to cook a meal, it is essential to select the necessary ingredients. This involves choosing high-quality, fresh produce and determining the amounts needed for each recipe. Here are some tips to keep in mind:
- Start with the recipe – before heading to the grocery store, make sure you have a clear idea of what is required for your chosen dish.
- Check your pantry – while making a list of ingredients, first look at what you already have on hand. It’ll save time and money.
- Budget accordingly – create a budget and allocate funds based on your list of necessary ingredients.
- Select fresh produce – always choose high-quality, fresh produce while selecting fruits, vegetables or any other required ingredient from the store.
- Maintain quantity knowledge – make sure to decide in advance how much you need of each ingredient based on servings so that you can purchase exactly what’s needed.
It’s crucial never to settle for subpar ingredients as they can significantly impact the taste and quality of your food. An additional tip ensures that all ingredients are prepped before starting the cooking process. Wash vegetables, chop herbs as appropriate or get protein marinated if required.
According to a source from Healthline, using fresh spices and seasonings can help boost nutrition value in food. When it comes to measuring ingredients, remember: a pinch is not a precise measurement unless you’re pinching a scientist.
Measuring Accurately
Accurate Measurement for Precision in Cooking
Measuring accurately is crucial for cooking perfection. Without precise measurements, the recipe’s quality may suffer, resulting in inferior taste and texture. Follow these four simple steps to ensure accuracy in your measurements:
- Use standardized measuring cups and spoons to ensure accuracy.
- Level off dry ingredients and spoon liquid ingredients into measuring cups.
- Measure ingredients at eye level for perfect measurements.
- Don’t overload measuring spoons or cups; scoop and level as needed.
To take it up a notch, invest in a kitchen weighing scale that measures grams or ounces. This can ensure even greater accuracy when it comes to working with specific ingredients such as flour or butter. In addition to the above tips, remember that even minor variations in measurement can have a significant impact on your recipe’s outcome; they may be positive or negative – either way, they will require adjustments accordingly.
Once upon a time, I attempted baking without using a proper measuring cup. Instead, I made do with an improvised one I created which could not provide the exact measure specified by the recipe book. As expected (in retrospect), the cookies turned out less than ideal: hard on the edges while soft and chewy inside – not quite what I had anticipated!
Why knead when you can Netflix and knead?
How to Make Pie Crust Without a Food Processor
To make the perfect pie crust without a food processor, you need to focus on making the dough right. In this section, we’ll provide you with the solution for making the dough by breaking it down into three sub-sections – mixing the dry ingredients, adding the butter or shortening, and incorporating the wet ingredients. These tips will guide you towards making the perfect crust for your pies every time.
Mixing the Dry Ingredients
To start with the recipe, we need to combine the dry components. This step is essential and needs utmost attention for the dough’s perfect texture and taste.
- Sift the flour: Sifting helps in removing any lumps or impurities present in the flour, making it fluffier.
- Add sugar and salt: Sugar adds sweetness, while salt enhances flavor. It is suggested to use these two ingredients in moderation.
- Mix baking powder/soda: Baking powder and soda help in leavening – adding air to create a fluffy dough.
- Incorporate dry yeast: If using dry yeast instead of instant yeast, add it now to activate it quickly while mixing.
- Spices/Flavors: As per recipe requirements, you can add various spices or flavors like vanilla extract or cinnamon powder at this stage.
- Whisk thoroughly: Use a whisk to mix all the ingredients consistently until even distribution.
It’s vital to mix different ingredients uniformly so that there are no concentrated sections. These various steps contribute significantly to mixing the dry components precisely. When using whole-grain flours, ensure they are fresh as their oil content leads to rancidity over time. For best results, store mixed flour in an airtight container away from sunlight. One suggestion would be always using a kitchen scale for measurement accuracy instead of cups or tablespoons. This controls consistency every time you bake something with similar measurements. Adding butter to dough is like adding a touch of magic – it transforms the plain and bland into something rich and indulgent.
Adding the Butter or Shortening
To incorporate fat into the dough, you need to use a significant amount of it in the recipe. This is where ‘Fat integration’ comes into play.
Adding the Butter or Shortening:
- Cut cold butter or shortening into small pieces.
- Add it to the flour mixture and use a fork or pastry cutter to blend until it resembles coarse sand.
- Sprinkle ice water on top and mix until the dough comes together.
- Divide the dough into two equal parts and form them into disks.
- Cover each disk with plastic wrap and refrigerate for at least an hour before rolling out.
- Roll out the chilled dough and use as needed.
Unique Details:
Mixing butter or shortening with flour forms a coating that prevents gluten formation. This fatty layer helps keep baked goods tender and flaky by limiting gluten’s development.
Call-To-Action:
Additions of fat such as butter or shortening give pastries their crumbly texture. Don’t miss out on this crucial step in making perfect pastries. Incorporate fat correctly, using the above steps, and create delightful baked goods every time!
Time to get wet and wild with these ingredients, because dry dough is so last year.
Incorporating the Wet Ingredients
To mix the wet components into the dough, you need to integrate them slowly and consistently. Here’s how to do it:
- Gradually add the wet ingredients to the dry ones while gently stirring.
- Blend until everything is well-combined, being careful not to overmix.
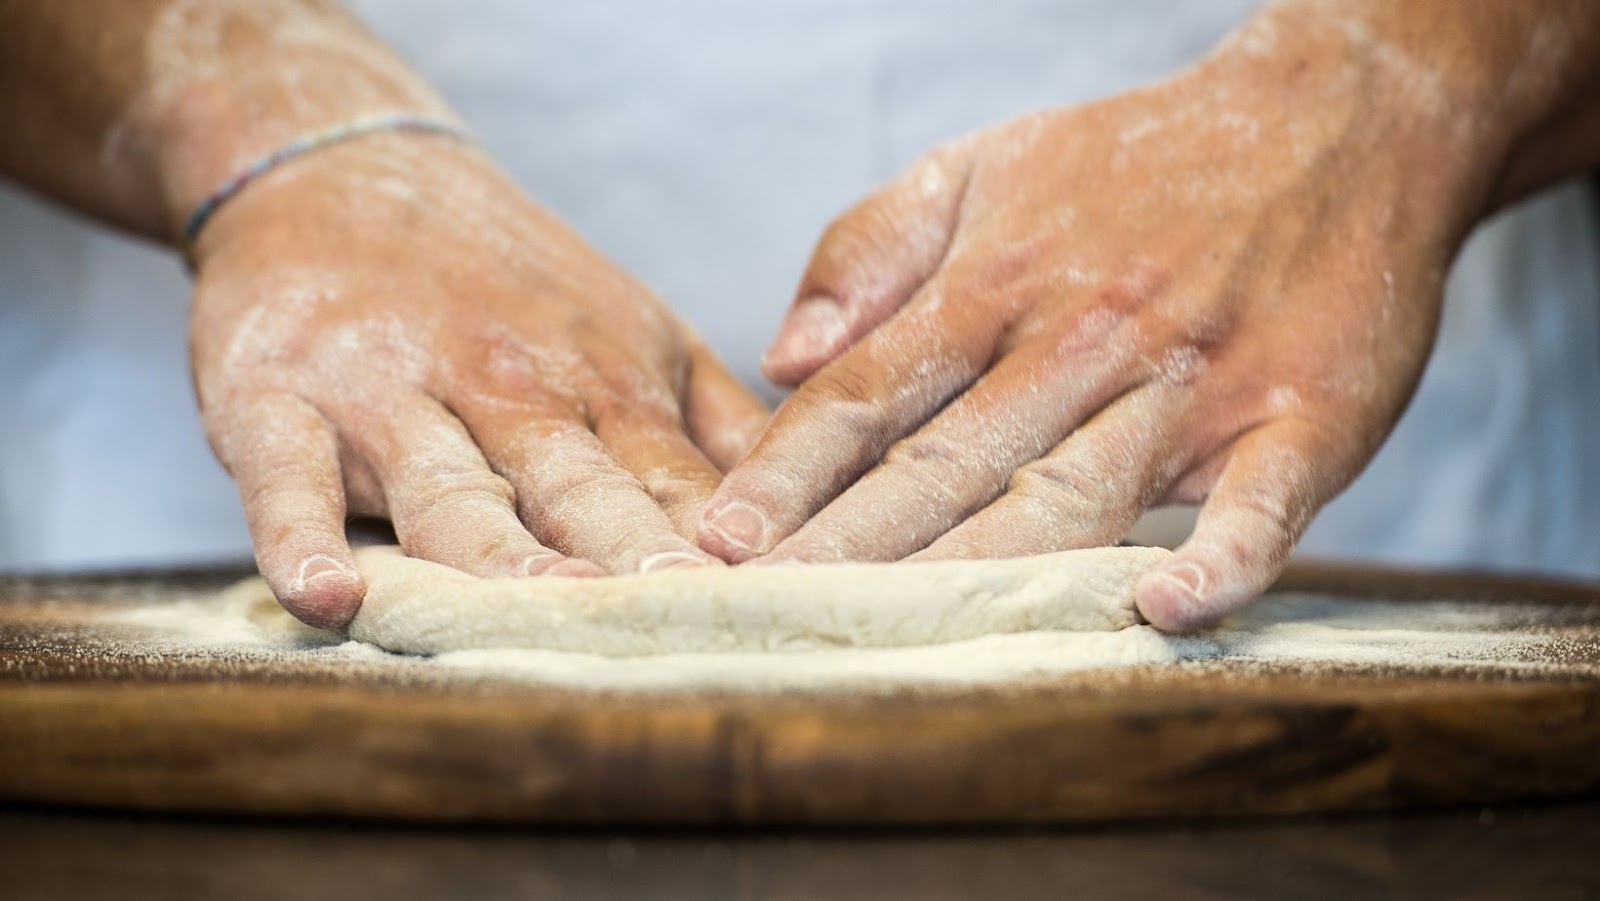
- Knead the moist dough briefly until it reaches the correct consistency.
It is essential to incorporate the liquid ingredients gradually and thoroughly for a smooth and evenly mixed dough. Did you know that incorporating wet components into dry components is known as ‘hydration’?
Why bother with yoga when kneading dough is a great way to work out your aggression?
Forming the Crust
To form the crust for your delicious pie, you’ll need to handle the dough with gentle precision. Divide it, roll it out, and place it in your pie dish for a perfect crust. These simple steps will make your mouth water and your guests asking for more.
Dividing the Dough
The dough is divided into portions to form the crust, which serves as the foundation of a pizza. Here’s how to evenly divide the dough:
- Use a scale to weigh the dough, and cut it into equal portions.
- Lightly flour each portion and shape them into balls.
- Cover the balls with a damp cloth for 10-15 minutes to allow them to rise.
- Roll out each ball to create the desired thickness for the crust.
When dividing the dough, ensure that each portion is weighed accurately to maintain consistency in texture and flavor. Creating even-sized balls helps in shaping the crust uniformly and achieving a consistent bake.
Did you know that pizza comes from Naples, Italy? It was once considered “peasant food” but slowly gained popularity worldwide because of its delicious taste and versatility. (Source: Britannica) Get ready to put those arm muscles to work, because rolling out the dough is like a workout with delicious carbs as your reward.
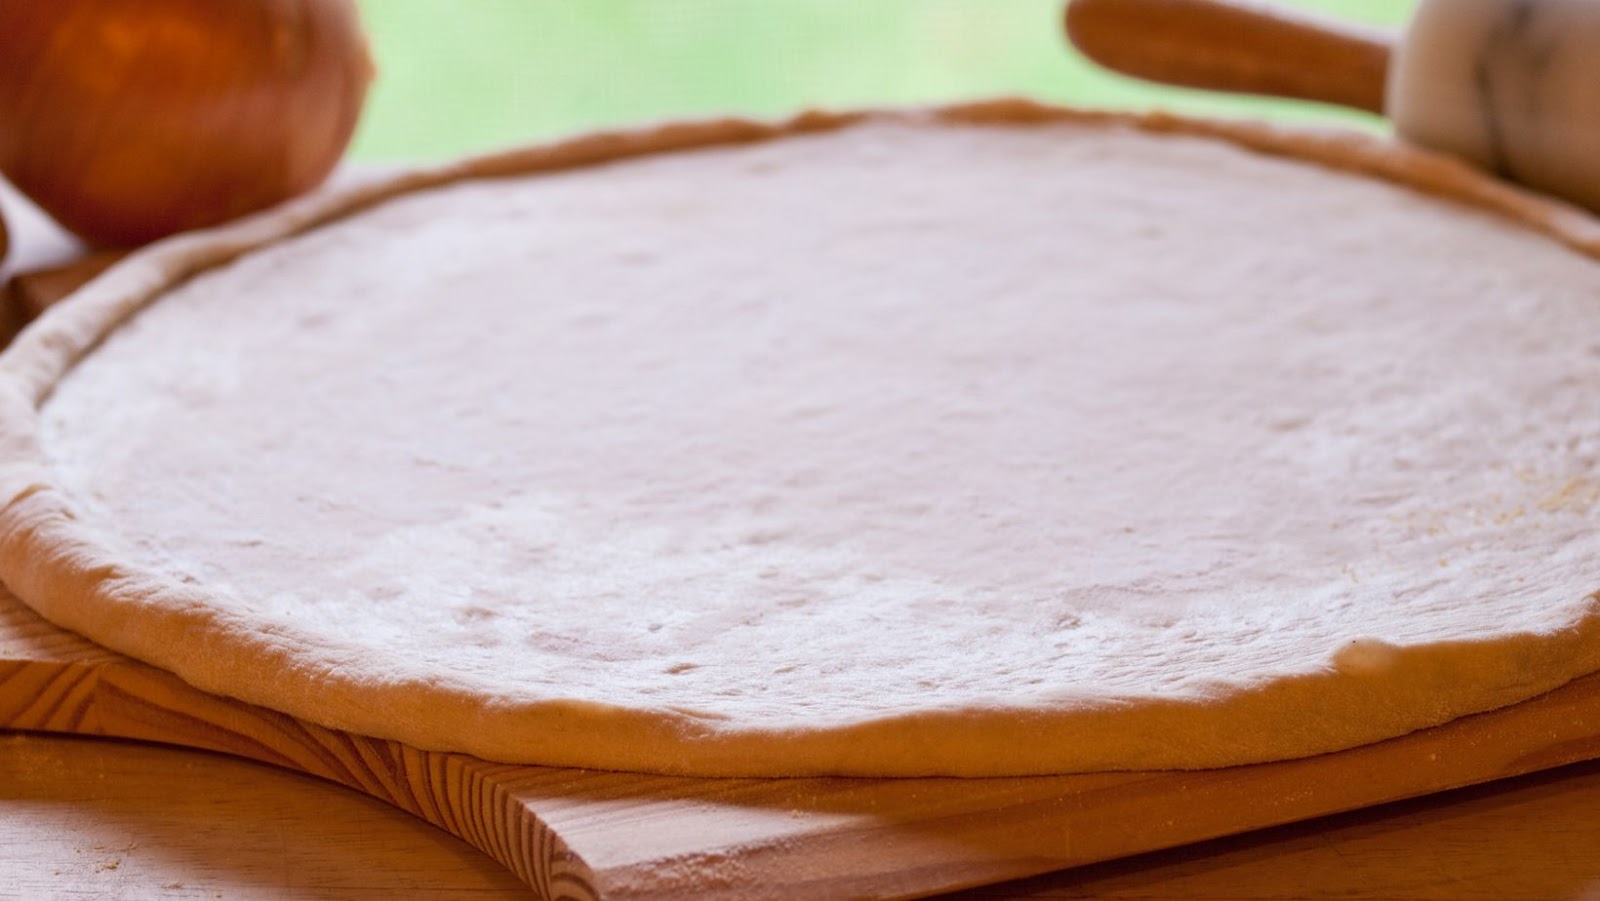
Rolling Out the Dough
Preparing the dough for the crust involves more than simply rolling out the dough. This process is crucial in achieving a perfect base for any baked dish. Here are five steps to help you achieve a well-formed crust:
- Ensure that your work surface is clean and dry.
- Dust your surface with flour to prevent sticking.
- Gently roll the dough from the center progressing towards the edge, ensuring it remains uniform in thickness.
- Occasionally rotate the dough during rolling, and add flour if it begins to stick or become too elastic.
- Once rolled to desired size, transfer to a baking dish and trim any excess edges.
Furthermore, ensure that your dough has been chilled before rolling for best results. With this technique, it can take practice perfecting – but practice makes perfect. When preparing dough for a pie, avoid pushing it into corners as this can cause uneven cooking. Instead, gently lift and drape the pastry over the edges of the dish.
A baker once shared their struggles with getting their tart crust just right. After several failed attempts, they realized they were not using enough fat in their recipe. Adjusting their recipe by adding a bit more butter resulted in a beautifully formed crust every time – proving that sometimes it’s all about experimentation and finding what works best for you.
Because if placing dough in a pie dish was easy, everyone would be a master chef – but alas, we must embrace the challenge and hope for a tasty outcome.
Placing the Dough in the Pie Dish
To create the perfect crust for your pie, it is essential to know the best way of fitting the dough into your dish. Here’s a step-by-step guide on how to do it:
- Place your rolled-out dough gently over the pie dish. Ensure that there are no wrinkles or folds.
- Press down on the dough lightly so that it molds to the shape of the dish.
- Cut off any excess dough that hangs over the edges of the dish using a knife or kitchen scissors.
- If you are using a fluted edge, press down on the sides of the crust slightly to make sure they stick and form a neat edge.
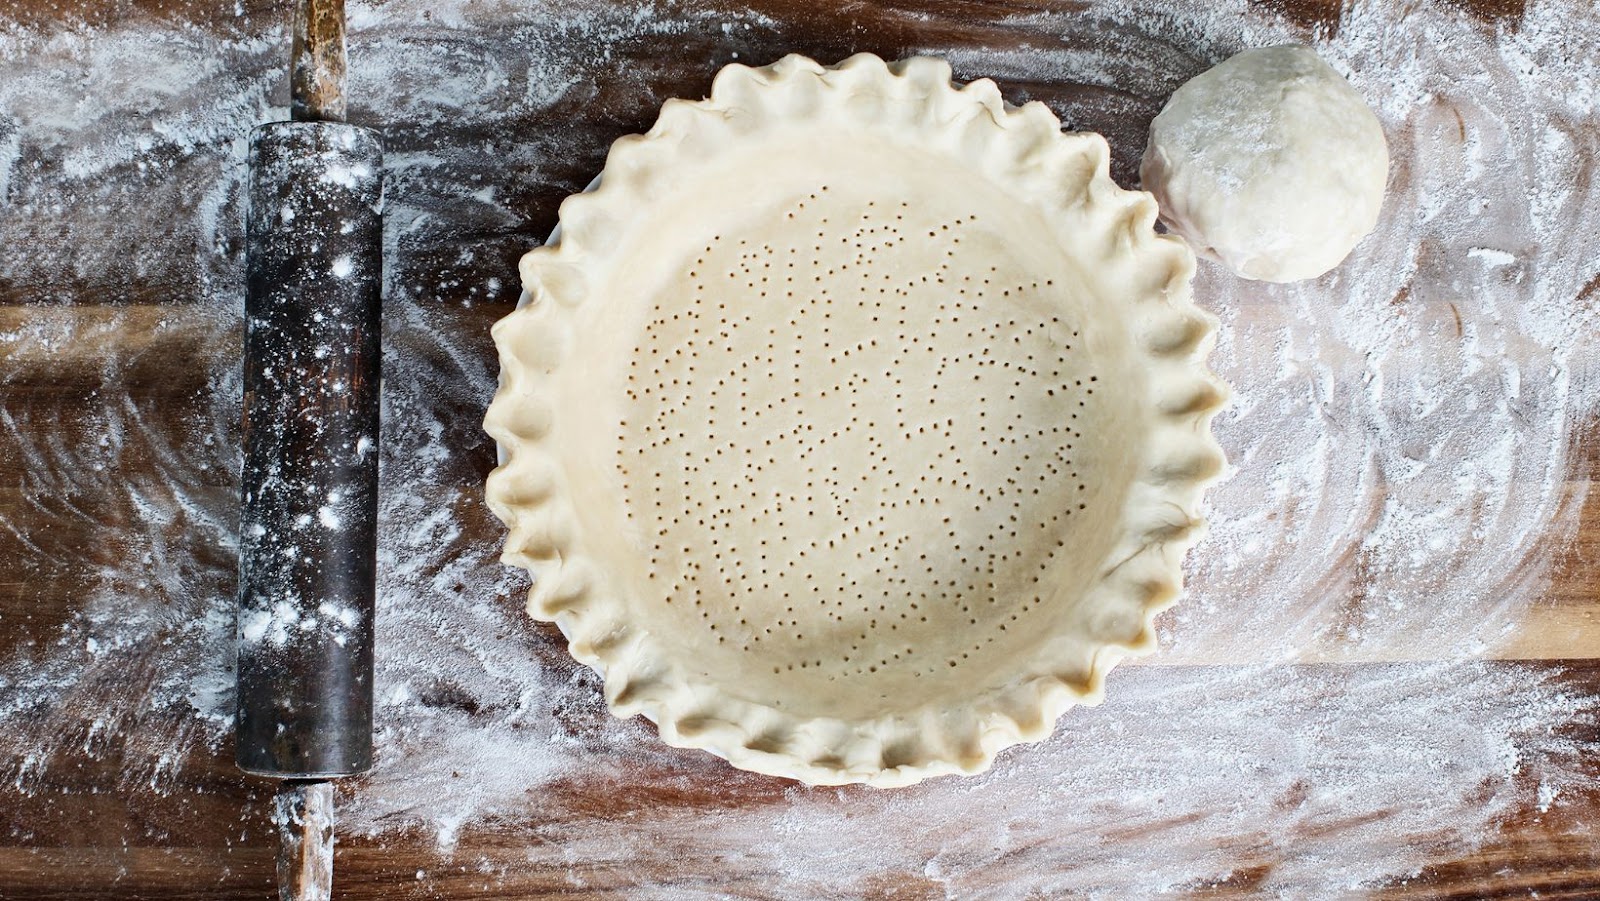
- Prick small holes into the base of the pastry with a fork, so that air can escape during cooking, preventing bubbles forming in your finished product.
Remember that presentation is key when it comes to baking pies. Don’t be afraid to use cookie cutters or other decorating tools to create unique designs in your crusts! Additionally, it is important not to overwork or handle the dough too much, as this may cause shrinkage and toughening.
Why settle for a plain crust when you can give it some personality? Flute those edges like your kitchen credibility depends on it.
Fluting the Edges
To achieve picture-perfect pie crust fluting with trimmed excess dough, and a decorative edge, follow these tips. Perfecting the fluting technique can take your pie to the next level, and these sub-sections can help you get there: trimming the excess dough and creating a decorative edge.
Trimming the Excess Dough
When preparing dough for baking, it is important to remove and shape any excess dough. This helps ensure a proper texture and appearance for the final product. Here’s how to fluting the edges like a professional:
- Start by rolling out your dough and placing it into the pie dish or baking pan.
- Trim off any excess dough from around the bottom edge of the dish using a sharp knife or pair of kitchen scissors.
- Using your fingers, press down gently on the edge of the crust to form a decorative scallop or wave pattern.
- If desired, you can also use a fork to create small indentations around the edge of the crust for an extra decorative touch.
- Firmly press down on any remaining loose or jagged edges with your fingers to seal them in place before baking.
It is worth noting that while trimming and shaping can help achieve a beautiful finish for your baked goods, it is also important not to overwork or handle the dough too much which can lead to tough pastry. Fluting the edges is an age-old technique used by bakers worldwide. It not only enhances presentation but also ensures that every slice has an even layer of delicious pastry as part of its structure.
Get ready to flut(e) your own way into the world of decorative pastry edges!
Creating a Decorative Edge
For those seeking to add an extra touch of elegance to their projects, incorporating a fluted edge is an excellent choice. This decorative technique involves creating evenly spaced indentations along the edges which add visual interest and dimensionality.
Here is a 6-step guide on how to create a fluted edge:
- Choose your desired tool: A fluting chisel, router, or molding plane will provide the cleanest results.
- Mark your spacing: Use measuring tape and a pencil to mark where each flute will start and end.
- Begin cutting: Hold your tool firmly and make precise incisions along each marking. Be sure to maintain even pressure throughout.
- Smooth out rough edges: Sand down any unevenness with fine-grit sandpaper, starting with coarse grit if necessary.
- Add finishing touches: Apply paint or stain as needed for an even more polished look.
- Enjoy your newly fluted project!
It’s also worth noting that variations in spacing can change the overall look of a fluted edge – closely spaced flutes appear intricate and delicate while wider spacing feels bolder and modern. Experimentation is key!
As with any woodworking technique, practice makes perfect. While it may take some initial trial and error, successfully incorporating fluting into your repertoire will greatly elevate the aesthetic impact of your work.
Don’t skip pre-baking the crust, unless you want your pie to fall apart faster than your New Year’s resolutions.
Pre-Baking the Crust
To pre-bake the pie crust for a perfect flaky pie, you need to dock the dough properly to prevent air bubbles. But that’s not all! Blind-baking the crust is equally important to avoid a soggy crust. In this section, we will show you how to ensure the perfect pre-baked crust by exploring the sub-sections: docking the dough and blind-baking the crust.
Docking the Dough
To dock the dough:
- Roll out your dough and place it in your chosen baking dish.
- Using a fork or a special tool called a docker, poke several small holes all over the surface of the dough.
- Continue with your recipe as directed, knowing that your crust will hold its shape without any unsightly air pockets.
It’s important to note that while this step might seem like an extra hassle, it is well worth the effort to ensure even cooking and appealing presentation. A smooth crust makes for a more enjoyable eating experience. Did you know that docking has been used in baking for centuries? Ancient bakers would prick bread dough with knives or pins to prevent uneven rising. Today, we have tools designed specifically for this task, making it easier than ever to achieve perfect results.
Blind-baking the crust? More like baking it with trust issues.
Blind-Baking the Crust
Pre-baking the crust
To achieve a perfectly crispy crust, it is essential to pre-bake it before filling it up with the desired ingredients. The process is commonly known as ‘blind baking’ and involves partially or fully baking the crust before adding any wet fillings.
Here’s a 4-Step guide on pre-baking the crust:
- Prepare the dough according to instructions, line the pie tin, and chill it in the freezer for at least 30 minutes.
- Prick the dough with a fork and add some weight to keep it from puffing up while baking. You can use ceramic pie weights or dry rice/beans wrapped in parchment paper.
- Bake the crust in a preheated oven at 375°F for 15 minutes if you are partially cooking it or 30 minutes if fully baking the crust. Afterward, remove any weight added carefully.
- Increase oven temperature to required heat for your pie recipe and add filling to baked crust then continue with further instructions for cooking.
It’s crucial to ensure that when blind-baking your pastry case, you do so until lightly golden brown. Any part of your pastry which isn’t fully cooked through will become soft when refrigerated later on. For best results, let your prepared dough rest in the fridge until it’s chilled enough not to slump down in your pan. Be sure also not to overdo rolling out thinner than necessary – this can both cause shrinking out while baking and doesn’t support heavier pie fillings well.
Let’s hope the filling is as satisfying as a juicy punchline, or else this pie will be a flop!


