How To Use A Food Processor To Make The Perfect Meal
Food Processor Mastery – Your Key to Effortless Meal Preparation
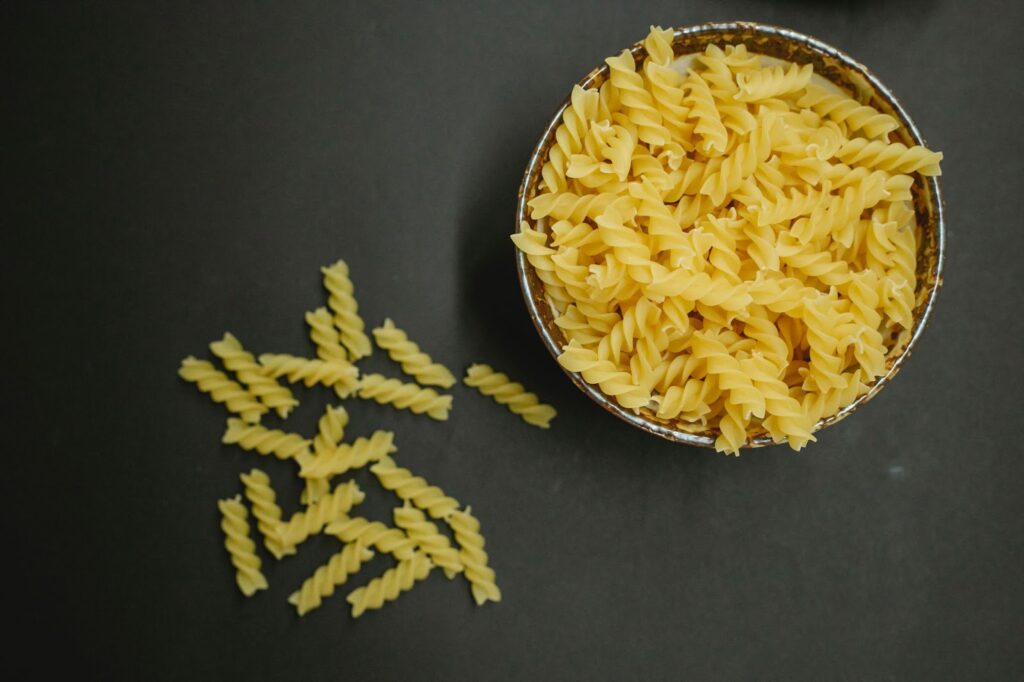
Food processors are versatile kitchen appliances that can revolutionize the way you cook and eat. These appliances can do a lot more than chop vegetables, particularly when used correctly.
Here’s an essential table to help you understand the many ways a food processor can prepare food:
| Function | Description |
| Shredding | Using specialized attachments, your food processor can quickly shred carrots, cheese or any other ingredient you need for your recipes. |
| Mixing | Whether it’s mixing bread dough or whipping cream filling, no task is too daunting for a food processor’s efficient blades. |
| Chopping | Shave time off meal prep by using your trusty food processor to dice onions, garlic, and even nuts! |
But what about slicing? A lot of people assume that you can only chop in a food processor, but even slicing is possible with the right blade attachment. One home cook shared how they used their food processor to create homemade potato chips to great success. They simply sliced the potatoes thin with the slicer blade, tossed them in oil and salted them before baking until crisp— proof that a little creativity goes a long way when using your food processor! Who needs boring old chips and dip when you can make fancy appetizers with just a push of a button?
Making Appetizers
To make the perfect appetizers with your food processor, turn to the “Making Appetizers” section with sub-sections like Dips and Spreads, Pesto, Hummus, and Salsa. Each sub-section offers unique and easy-to-make recipes that will impress your guests at any party or gathering. Let’s dive in and create delicious dips and spreads in a snap!
Dips and Spreads
Discovering Different Condiments
Condiments are an array of savory and sweet sauces or spreads that accompany appetizers, starting a meal on a flavorful note. They enhance the taste of the starters and give them an enticing aroma. Below are some popular condiments you should consider while preparing your appetizers:
- Hummus: A creamy blend of boiled chickpeas, garlic, olive oil, tahini sauce, and lemon juice.
- Guacamole: A Mexican topping made from mashed avocados with lime juice, salt, onion, chili peppers, tomato and cilantro
- Salsa: A spicy mixture of chopped vegetables (tomato, onion, cilantro), jalapeno peppers and lime juice.
- Baba Ganoush: A smoky dip that is made from roasted eggplants mixed with tahini sauce, parsley leaves and drizzled olive oil
- Spinach-Artichoke Dip: Spinach blended with artichokes in a rich blend of sour cream and cheese.
Additionally, salad dressing like Caesar sauce could become perfect accompaniment to your vegetable rolls while fruit cream makes an excellent choice for the sweeter palate. We also recommend homemade sauces to avoid preservatives. Did you know mustard was one of the earliest British condiments? Its name was derived from the old English word ‘musterd’.
Putting pesto on anything automatically makes it fancier, even if it’s just a piece of bread that you microwaved for 10 seconds.
Pesto
For this section, let’s explore the delectable world of basil pesto. This popular Italian sauce is typically made with fresh basil leaves, garlic, pine nuts, Parmesan cheese, and olive oil. To make it, simply blend all of the ingredients together in a food processor until smooth and creamy. Use it as a dip for vegetables or crusty bread, or toss it with pasta for a quick and easy weeknight dinner.
Below is a breakdown of the key ingredients and measurements necessary to create a classic pesto sauce:
| Ingredient | Measurement |
| Basil leaves | 2 cups packed |
| Garlic cloves | 3-4 |
| Pine nuts | 1/3 cup |
| Parmesan cheese | 1/2 cup grated |
| Olive oil | 1/3 cup |

It’s important to note that pesto can be customized to suit your taste preferences – try adding lemon juice for some zing or swapping out the pine nuts for walnuts or almonds.
When making pesto, keep in mind that you don’t want to over-process the ingredients or the sauce may become too thin and lose its texture. Start by pulsing the garlic and pine nuts together before adding in the basil leaves and Parmesan cheese. Then slowly drizzle in the olive oil while continuing to process until everything is well-combined.
Once you’ve created your perfect batch of pesto, store any leftovers in an airtight container in the refrigerator. It will keep for up to a week but may begin to darken slightly over time – this is normal and won’t affect its flavor. To take your appetizers up a notch, try using pesto as a flavorful marinade for grilled chicken skewers or mix it into cream cheese for an easy party dip. The possibilities are endless!
Why settle for plain old hummus when you can turn it into a dipping adventure?
Hummus
Incorporating the traditional Levantine staple into your party spread can be delightful. Hummus is a versatile dip made of chickpeas, tahini, olive oil, and lemon juice. Here are four points on how to make it stand out:
- Experiment with flavors by sprucing up with garlic, cumin or smoked paprika.
- Tweak the texture by adjusting the amount of olive oil or water.
- Health-conscious guests would love hummus made with Greek yogurt instead of tahini.
- Add a layer of richness by spreading hummus on pita bread and topping with roasted vegetables or grilled chicken.
For an elevated touch, top it off with Salt & Sumac seasoning for tanginess and visual appeal. The nutty flavor can also be enhanced by garnishing with pine nuts or parsley. Don’t worry about making it ahead; hummus can be refrigerated in an airtight container for up to three days. Include at least one hummus variation in your appetizer spread and seize the opportunity to indulge your guests’ palates!
Looking for a way to spice up your party? Add some salsa, and not just the dip!
Salsa
Creating a Flavored Sauce
A well-made flavored sauce can make your appetizers stand out. Here are three points to consider while making a flavored sauce for your next party.
- Choose the right ingredients – Start with tomatoes, onion, garlic and lime juice. Add jalapenos or any other pepper for extra heat.
- Balance the flavors – Make sure to balance acidity, sweetness and spiciness. Salt brings all three together. Test often, add more salt if necessary.
- Serve it fresh – Salsa is best loved fresh. Store leftovers in an airtight container and refrigerate up to 3 days.
As you prepare the perfect appetizer sauce, here’s an additional tip – try freezing leftover salsa in ice trays for future use in cocktails or stews.
Get ready to impress your guests with these main course and side dishes, because let’s face it, no one remembers the appetizers.
What Can You Make With a Food Processor
To make main courses and sides with ease, use your food processor. Among the many things you can make, we’ll focus on meat and vegetable patties, pizza and bread dough, shredded meat, and grated cheese and vegetables. Keep reading to discover how to create these dishes in no time with your food processor.
Meat and Vegetable Patties
Follow these steps to make Meat and Vegetable Patties:
- Choose your meat of choice; turkey, beef, or chicken.
- Mix with fresh vegetables such as carrots, onions and bell peppers.
- Add in your favorite spices such as garlic powder and cumin to customize your flavors.
- Form into patties and grill on a stovetop or oven for 15-20 minutes until fully cooked.
- Serve with seasonal vegetables or a side salad for a well-rounded meal.
For an extra kick, try substituting some of the meat with quinoa or lentils for a crunchy texture. Customize the recipe further by swapping out different types of vegetables based on seasonality.
Don’t miss out on incorporating Meat and Vegetable Patties into your meal rotation! These delectable protein-packed treats are sure to be a crowd-pleaser and provide wholesome nourishment for the whole family.
Don’t knead a therapist, just knead some dough and make your own therapy pizza.
Pizza and Bread Dough
When it comes to preparing the perfect dough for both pizza and bread, there are various factors to consider. From the type of flour used, to the water and yeast ratio, each element plays a crucial role in achieving a fantastic end result.
To begin with, start by mixing together flour, salt and yeast in a bowl or stand-mixer. Slowly pour in some warm water while continuing mixing, until you get a sticky ball of dough. Depending on the recipe, you may need to knead the dough longer for it to be smooth and elastic. Then cover it with a warm cloth and let it rest before rolling it out into desired shape – either for pizza or bread.
It’s important to note that proofing time (the duration of letting the dough rise) will vary depending on temperature and humidity levels. After rising, the dough can then be cooked according to instructions provided in your recipe. Apart from temperature control during proofing, using different flours such as whole wheat or spelt can yield unique flavors and textures that complement specific types of toppings.
For instance, a personal anecdote tells of how adding finely chopped rosemary into my homemade pizza dough brought an incredibly fragrant aroma to every slice served at dinner parties. Try experimenting with herbs—such as thyme or oregano—or spices like garlic powder or paprika if you want an added twist in taste.
Shredded meat is like a breakup – it may be painful to tear apart, but it makes for some damn good tacos.

Shredded Meat
This section explores the preparation of meat that is shredded into small pieces.
- It is a popular method for tacos, barbecue sandwiches and more.
- Shredded meat can be prepared in slow cookers, pressure cookers or on stovetops with liquids such as broth, beer or wine.
- The most commonly used meats include chicken, pork or beef.
- Apart from being delicious and easy to prepare, shredded meat also offers great texture to various dishes.
In addition to the aforementioned details, creating pulled pork using an oven is another effective method of preparing this type of meat. Once, a chef at a barbecue restaurant spoke about how slow-cooking his beef brisket for 12 hours adds flavors that cannot be achieved otherwise. This underscores the importance of patience when cooking shredded meat.
Who needs a fancy salad when you can just grate a bunch of cheese on top of your vegetables and call it a day?
Grated Cheese and Vegetables
With a combination of savory flavor and nutritious value, this section covers the use of finely shredded dairy products and plant-based items in your culinary creations. Here are some points to guide you:
- Grated cheese: A versatile ingredient that can be used as a topping, binding agent or enhancer in various dishes. Cheese like parmesan, cheddar, pepper jack, mozzarella, feta and more can offer unique flavors and textures.
- Shredded vegetables: A healthier alternative to regular fries or chips, vegetable shreds can be oven-baked for a protein-rich and crunchy snack. Vegetables like zucchini, carrots, beets, potatoes and sweet potatoes make great options.
- Pizza toppings: A classic pairing of grated cheese with tomato sauce and other toppings can create endless pizza varieties. Try adding vegetables such as bell peppers, onions, mushrooms or artichokes for added nutrition.
- Salad toppings: Adding shredded cheese or vegetables on top of salads can add an extra layer of texture and taste while offering additional vitamins to the dish.
When including grated cheese or vegetables in your meals, consider investing in good quality graters or slicers to ensure consistency in cut sizes. Also keep in mind certain dietary restrictions such as lactose intolerance when using dairy products. To reduce food waste and add an eco-friendly approach to your cooking process, save the excess vegetable scraps during shredding process for homemade stocks or composting.
Pro Tip: For a unique twist on cheesy pasta dishes like macaroni and cheese or lasagna, try using grated cauliflower as a low-carb substitute for traditional noodles.
Who needs a significant other when you can have a dessert that satisfies all your cravings?
Making Desserts
To make delectable desserts with your food processor, turn to our section on ‘Making Desserts’. We’ve got you covered with solutions for creating the perfect cake batter and frosting, dough for cookies and tart crusts, nut and graham cracker crusts, and fruit sauces and coulis.
Cake Batter and Frosting
When it comes to creating a delectable dessert, one must focus on the amalgamation of both the cake batter and frosting. Attention to detail is the key to a perfect dessert.
- Cake Batter: The cake batter is the foundation of every good cake. Using quality ingredients, mixing them delicately, and precisely measure each element creates an impeccable texture for the final product.
- Frosting: An essential component of every cake, frosting adds flavor and aesthetic appeal to desserts. From buttercream to cream cheese icing, there are various options that can be made according to the taste preference.
- Perfect Combo: A perfect balance between cake batter and frosting enhances the flavors and textures of each component. Pairing an appropriately light-colored cake with dark color frosting or vice versa will help create an elegant contrast.
While preparing this delicacy, one needs to take care of certain unique elements such as mixing the batter just right can have a massive impact on how fluffy or dense your baked treat turns out. Similarly, adding salt in measured amounts can help enliven natural flavors.
Believe it or not, in ancient times cupcakes were baked because they used less coal than full-sized cakes hence were a more economical option. They were also easier to distribute among friends and family without having any wastage. Time to roll up your sleeves and get your hands sticky, because making the perfect dough for cookies and tart crusts is not for the faint of flour.

Dough for Cookies and Tart Crusts
For creating perfect dough for cookies and tart crusts, mix the right amount of butter, flour, sugar, and eggs until a smooth dough forms. The texture should be slightly crumbly yet cohesive.
Here is a table detailing the precise measurements for making the dough-
| Ingredients | Quantity |
| Butter | 1/2 cup |
| All-purpose Flour | 1 cup |
| Granulated Sugar | 1/4 cup |
| Egg (room temperature) | 1 |
To add more depth to your pastries, try using brown sugar instead of white sugar. Also, experimenting with different types of flours such as almond flour or adding vanilla extract can elevate the taste. To make sure that the crusts do not shrink while baking, prick them with a fork before baking. Additionally, chilling the dough before rolling it out helps in maintaining its shape during baking. Trust us; your confections will look flawless!
If you’re nuts about dessert (and who isn’t?), try our nutty and delicious graham cracker crusts.
Nut and Graham Cracker Crusts
Featuring Edible Bases
With different cravings and alternatives on the menu, the article has brought up edible bases for our desserts. Nuts and Graham cracker crusts are two ingredients that add an element of crunch to some of our most beloved dishes.
| Graham Cracker Crust | Nut Crust |
| 1 1/2 cups graham cracker crumbs
1/3 cup sugar 6 tablespoons melted butter |
1 cup nuts (pecans, almonds, walnuts)
2 tbsp granulated sugar Salt 4 tbsp melted butter |
| Mix ingredients & press into a pie dish.
Bake for 10 minutes at 325°F. |
Pulse nuts in a food processor.
Add remaining ingredients & blend. Press mixture into pie dish. Bake for 10 minutes at 350°F. |
Unique Details
Graham cracker crusts are easy to make since graham crackers are easily available in stores. The nut-based crust, on the other hand, can be made using any kind of nuts like pecans, almonds, or walnuts based on preferences. Both crusts add texture to pies.
Take Action!
Revamp baking skills by trying out various crust combinations using your favorite dessert recipes – don’t miss out!
Who needs a significant other when you can have a delicious fruit sauce to pour over your dessert?
Fruit Sauces and Coulis
Fruit Syrups and Purees:
Fruit syrups and purees are a popular dessert topping made from fresh or frozen fruits. They are versatile and used in numerous desserts, including cakes, tarts, pancakes, waffles, ice cream and more.
- Versatile: Fruit syrups and purees are available in different textures, viscosity levels, sweetness levels etc., which makes them versatile for use in various dessert recipes.
- Adaptable: These toppings go well with several components present in a dessert from crusts to different types of creams.
- Simple process: Making these sauces is relatively simple as they can be created by mixing fresh or frozen fruit with sugar, water and any additional desired seasonings like vanilla extract. The mixture is then heated until the desired consistency is achieved.
- All-Natural: Fruit syrups and Purees are often made without artificial preservatives or additives that make them a healthier option compared to other varieties of dessert toppings.
- Enhanced Flavor: A significant advantage of using fruit syrup or puree as a dessert topping is their ability to enhance the overall flavour profile of the dish.
- Shelf Life: Fruit Syrup has a longer shelf life than Puree Liking depending on how it was produced.
Freshly-made fruit sauces add unique flavours and bright colours to desserts while accentuating their natural sweetness and tartness. Studies have shown that Plums have antioxidative agents such as chlorogenic acids that contribute towards minimizing cancerous growths.
Remember, the key to getting the best dessert results is to follow the recipe…unless you’re like me and enjoy living life dangerously with spontaneous ingredient substitutions.