
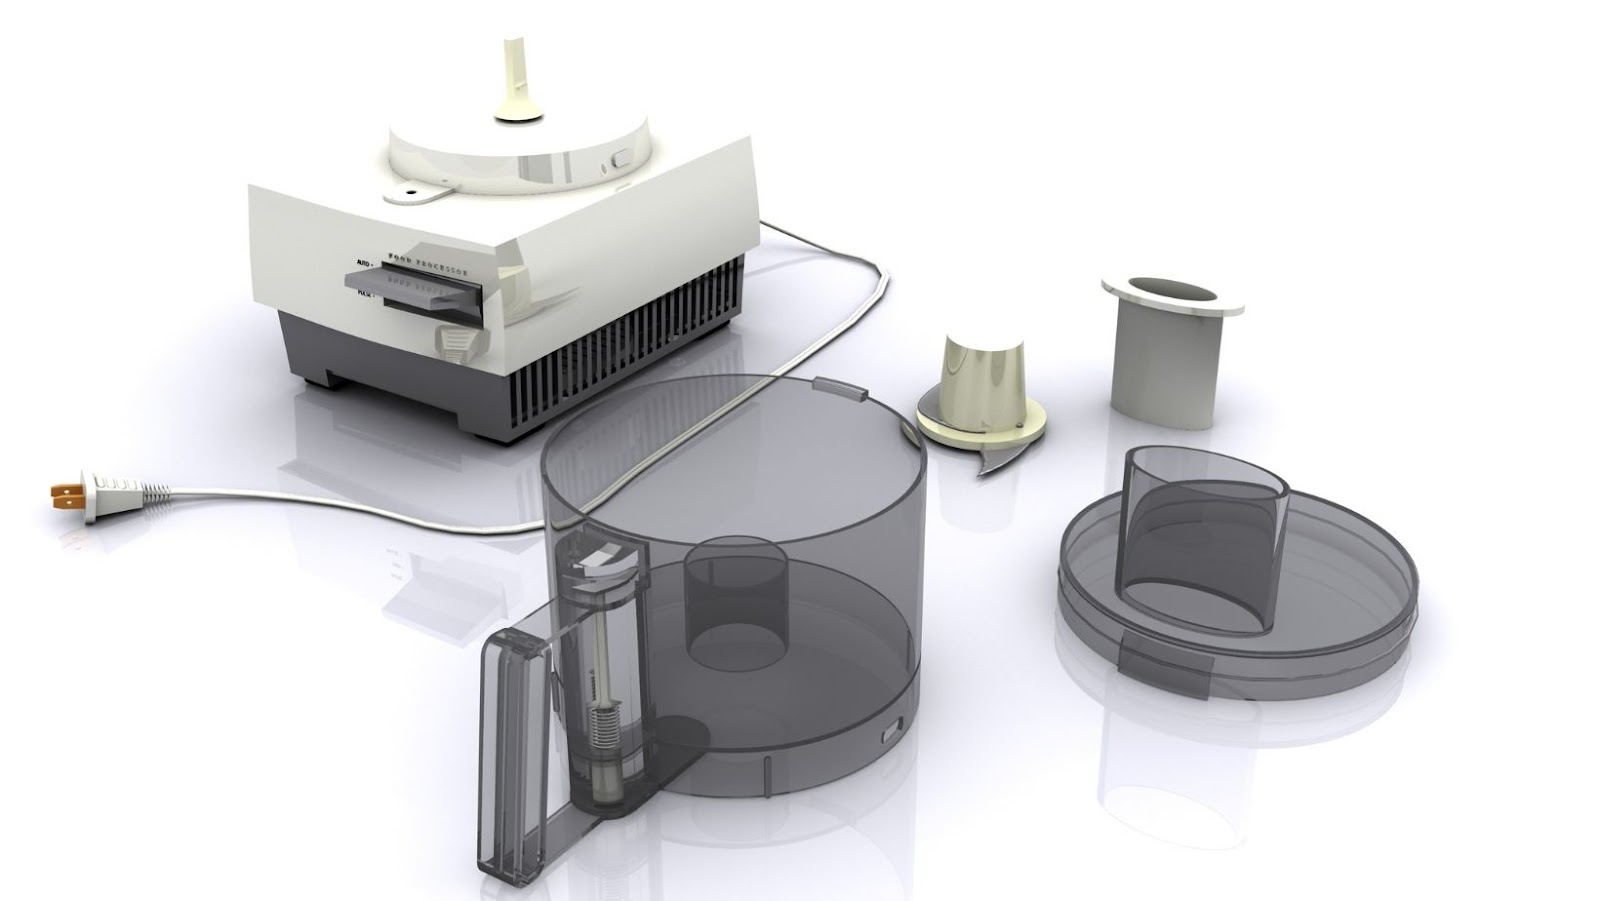
Assembling The Food Processor
To prepare for the assembly of your KitchenAid food processor, you need to complete a few essential tasks. The first sub-section, “Unboxing the KitchenAid Food Processor,” will guide you on opening the packaging box and unpacking the parts included in your device. The second sub-section, “Cleaning and Drying the Parts,” will detail the cleaning procedure needed to ensure that your machine is free from any dust or debris before assembly.
Unboxing the KitchenAid Food Processor
When preparing to use the KitchenAid Food Processor, it is essential to get started with appropriate unboxing procedures. To learn more about the unboxing process of the KitchenAid Food Processor, continue reading.
Follow these six simple steps for unboxing the KitchenAid Food Processor:
- Start by locating the package containing your food processor.
- Use a pair of scissors or a sharp object to open the box along its seams.
- Once you have opened the package, remove all parts, accessories and equipment from their packaging and set them aside.
- Carefully inspect all items for any visible damage or defects before assembling or using them.
- Attach any necessary parts according to provided instruction manuals and charging cables.
- Your KitchenAid Food Processor is now ready for use!
Additionally, ensure that you take note of unique features that may differ from other food processors. It is also essential to consult user manuals for specific details about handling your new equipment appropriately.
Pro Tip: Remember to keep all original packaging in case of any repairs or replacements down the line. Cleaning and drying the parts may take a while, but it’s nothing compared to the time it’ll take to assemble everything wrong and then have to start over.
Cleaning and Drying the Parts
Using a Pristine Approach to Clean and Dry Machinery Parts
Machinery assembly requires clean and dry parts for optimal performance and longevity. Follow these three steps to ensure each part is up to standard:
- Remove visible debris with a soft-bristled brush or compressed air.
- Clean the parts using a mild solvent, then rinse thoroughly with warm water.
- Dry completely with lint-free towels or air drying equipment.
It’s essential to repeat this process as appropriate throughout assembly, especially for sensitive components such as bearings.
Precision at Pre-Assembly Stage
Never compromise on machinery pre-assembly preparation; it’s crucial. Flaws due to improper handling may lead to severe consequences during post-assembly operations. Paying close attention during the cleaning and drying process is critical.
I recently worked on an assembly where negligence in pre-assembly preparation led to faulty components that had to be replaced, causing project deadlines and financial losses. As they say – prevention is better than cure.
Get ready to slice, dice and pulverize your way to culinary pleasure with a KitchenAid Food Processor that even Gordon Ramsay would be proud of!
KitchenAid Food Processor How to Use
To assemble your KitchenAid food processor, you need to complete three steps. Attach the work bowl to the base, install the blades and discs, and lock the lid in place. These easy steps will ensure that your food processor is assembled correctly and ready to use for all your food processing needs.
Attaching the Work Bowl to the Base
Connecting the Food Processor Bowl to the Machine Base
To assemble your KitchenAid food processor, it is necessary to connect the work bowl to its base before use. This ensures efficient and effective results and reduces potential hazards during operation.
Here are 6 steps on how to connect the food processor bowl to its machine base:
- Turn off and unplug the device from the power source.
- Quickly examine that all components are clean and prepared for usage.
- Beneath the food processor’s base unit, locate a circular compartment where the work bowl fits into nicely.
- Pick up the work bowl and align it with its matching compartment in the machine base unit. Once they lock correctly, twist it gently clockwise till snapping sounds are heard, indicating secure locking of slots.
- Ensure proper attachment by applying slight pressure downwards on all corners of work bowls while holding the onboard handle upward with your other hand. The bowl should sit flush against the machine base plate without any wobbling or movement.
- The apparatus is now assembled and ready for usage once plugged in and switched on after arranging additional components as desired for your recipe.
It is imperative that you firmly attach each piece of equipment according to these instructions before operating your appliance. Failing to do so may result in damage or injury.
When attaching delicate or wet ingredients, always start at slow-speed settings before increasing gradually as required. Apply consistent pressure when feeding items into their targeted feeder tube areas during operation.
Safely storing separate components by following manufacturer directions will prolong lifespan between uses.
If you thought ninja skills were only useful in combat, think again as you expertly slice and dice with the KitchenAid Food Processor blades and discs.
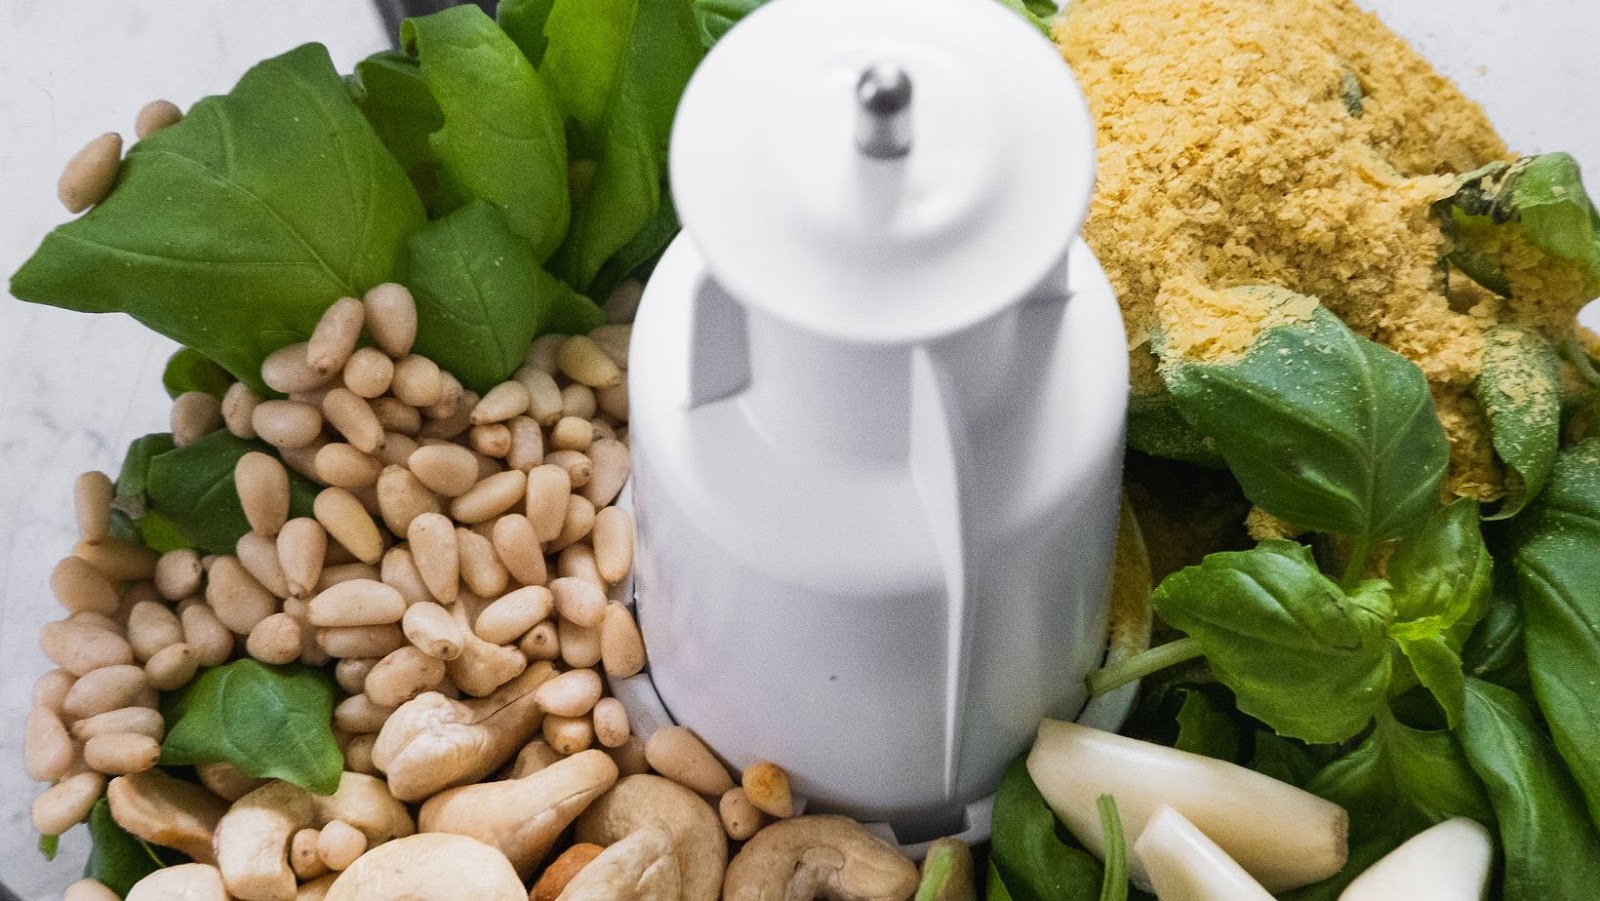
Installing the Blades and Discs
To set up the food processor for use, it is important to install the relevant blades and discs required for the task at hand.
Here’s a 6-step guide on how to ‘Outfitting your KitchenAid Food Processor with Blades and Discs’:
- Remove the lid of the food processor by turning it counterclockwise.
- Select which blade or disc you need to use from your accessory kit.
- Insert the appropriate blade or disc making sure that it clicks into place.
- Line up any tabs or notches that may be present on your selected blade or disc with corresponding grooves inside the processor.
- Replace and secure the top lid by snapping it back onto the main base in a clockwise direction.
- Double-check to ensure all parts are securely fitted before proceeding with processing.
Please note that not all blades and discs can be used interchangeably, so refer to user manual instructions for specific recommendations.
It is also essential to clean your food processor after each use, particularly around areas where blades are installed, ensuring no leftover food particles remain uncleaned.
Did you know? The first-ever KitchenAid food processor was only released in 1977 but soon became a must-have in modern kitchens worldwide due to its efficiency and versatility!
“Locking the lid in place is like trying to put a stubborn toddler in a car seat, it takes some maneuvering and a lot of patience.”
Locking the Lid in Place
When it comes to equipping your new KitchenAid Food Processor, the first priority is ‘Ensuring Secure Cover Placement.’ This step is critical as it ensures that all the ingredients stay safely inside the processor while you operate the device effortlessly. Below are three simple and logical steps to effortlessly ‘Ensure Secure Cover Placement.’
- Align and match the feed tube with the food pusher attachment and twist it over to lock in place.
- Align the cover in such a way that its handle aligns with one of the handle areas of your food processor’s base.
- Turn the cover clockwise till you hear a “click” sound indicating that it’s locked securely in place.
It’s important to note that even when placing small/light ingredients inside your KitchenAid Food Processor, you must ensure secure cover placement to avoid any mishap. To prevent any accidents while using a KitchenAid Food Processor, ensure that your hands are dry before attempting to use them. A firm grip on your hand would also prevent accidental slippage. Furthermore, be mindful when handling the razor-sharp blades inside your appliance- do not try adjusting or servicing them yourself. To sum up, enhancing kitchen experience via elusive home appliances has always been a personal go-to. Hence, following these simple but important steps can give more comfort and convenience while being safe at it too! You won’t find Gordon Ramsay’s temper in this kitchen, thanks to the foolproof KitchenAid Food Processor.
Testing the Assembled Food Processor
To ensure your KitchenAid food processor is perfectly assembled, you need to test it out. In order to test the assembled food processor in “Testing the Assembled Food Processor” with “Running a Simple Test” and “Confirming the Blades and Discs are Installed Correctly” as the solution briefly.
Running a Simple Test
Running an Initial Test on the Assembled Food Processor
A food processor is a versatile kitchen appliance that can make cooking easier and more efficient. Before using it, it is important to run an initial test to ensure that the assembled machine works properly. Follow these easy steps:
- Plug in the power cord and turn on the switch.
- Insert a piece of food into the food chute.
- Press down on the pulse button and let go.
If you hear the motor running and see that the food has been chopped or processed appropriately, then your food processor is ready to use!
It is also recommended to clean and dry all parts before first use, following instructions from the manufacturer’s manual for best results.
Remember, always read through your manual carefully before getting started with any new appliance.
A true fact: According to Consumer Reports, some food processors have even been tested for durability by grinding dozens of pounds of meats and vegetables without fail. Let’s hope the blades and discs are securely in place, otherwise we may end up with a new kitchen ceiling decoration.
Confirming the Blades and Discs are Installed Correctly
To ensure proper installation of the blades and discs in the food processor for optimal performance, it is essential to verify their placement.
- Inspect the blade and disc slots to see if there are any visible signs of damage or debris.
- Place the blade or disc into their respective slots by aligning them with the notches and ensuring they lay flat against the processor base.
- Twist each blade or disc clockwise until you hear a clicking sound indicating that they are securely locked in place.
- Double-check that all blades and discs are positioned correctly, without any gaps or protrusions that could cause leaks.
- If multiple blades or discs are provided, make sure you have selected the appropriate components for your task and have positioned them correctly.
- Finally, once all blades and discs are installed correctly, turn on the food processor briefly to confirm that they function correctly without making any strange sounds.
Using precision to ensure accurate placement of different disks is also important, as even small adjustments can result in significant changes in slicing thickness.
Pro Tip: Before placing any components on a surface for inspection or replacement, use a clean cloth to wipe down each part of food residue or debris.
Remember folks, always read the instruction manual before attempting to blend a brick in your new food processor.
Additional Tips and Safety Measures
To ensure safe and efficient use of your KitchenAid food processor, this section on Additional Tips and Safety Measures with sub-sections Understanding the Food Processor’s Capacity and Limits and Operating the Food Processor Safely and Efficiently will come in handy. Learn how to take advantage of the processor’s features while avoiding common mistakes that could potentially harm yourself and your appliance.
Understanding the Food Processor’s Capacity and Limits
When it comes to the limits and capacity of your food processor, being aware can save you from accidents and damages. Here’s what you need to know.
| Size and Wattage: | Smaller sizes are suitable for grinding nuts and spices whereas larger ones are good for bulkier items. High wattage processors work better with tough or dense ingredients. |
| Food Quantity: | Keep an eye on how much food is being processed at a time. Overloading can lead to uneven processing & may cause the lid to pop open, scattering contents all over. |
| Bowl Capacity: | Never fill the bowl beyond its capacity; otherwise, it could damage your equipment or cause leaks/malfunctions. Refer to the manual for accurate measurements. |
Aside from these fundamentals precautions, it’s advisable to trim any excess fat and sinew before grinding meat so that the blades don’t get clogged up.
To ensure that your machine works optimally while also minimizing accidental risks, use only dry utensils while touching electrically-powered machines – moisture can lead to electric shock hazards! Clean up immediately after using your processor, making sure all parts are dried completely before assembling them back together.
Remember, the food processor is not your mortal enemy – it just wants to chop things up. Handle with care and it’ll be your best kitchen ally.
Operating the Food Processor Safely and Efficiently
To ensure the safe and efficient operation of your food processor, it is essential to follow specific guidelines. These guidelines will help you avoid injuries while improving the quality of your food processing.
- Before operating the food processor, carefully read all instructions provided with the appliance.
- Always use the right blade for the task at hand and ensure that it is installed correctly before use.
- Never put your fingers or other objects into the feed tube while the processor is running. Always turn off the unit, unplug it, and remove any attachments before attempting to clean or handle it.
It is also crucial to remember that safety extends beyond simply using the proper techniques during operation. Ensuring that your blades are sharp and well-maintained will dramatically improve both productivity and safety when working with a food processor.
Pro Tip: Always replace dull, damaged or warped blades promptly to ensure optimal safety during use.
Remember, the only thing scarier than a dull kitchen knife is a neglected food processor.
Storing and Maintaining the KitchenAid Food Processor
To store and maintain your KitchenAid food processor properly, you need to know how to disassemble and clean the parts, and also store it safely. In this section titled “Storing and Maintaining the KitchenAid Food Processor,” we will discuss the solution to keeping your kitchen appliance in good condition. The sub-sections, “Disassembling and Cleaning the Parts” and “Storing the Food Processor Safely,” will be briefly introduced for you to gain an overview of the solutions that will be discussed in greater detail.
Disassembling and Cleaning the Parts
When it comes to preserving and maintaining the KitchenAid Food Processor’s longevity, it is essential to disassemble and sanitize its parts. By following these guidelines, you can guarantee the machine’s durability and hygienic condition.
- Remove the Blade: The first step is to detach the blade from the food processor by rotating it counterclockwise, allowing it to be extracted safely.
- Detach Bowl: Take out the bowl by turning it in a clockwise direction until it gets loose. Hence, you can remove the work cup effortlessly along with the lid.
- Cleaning Time: To sanitize each piece effectively, wash them carefully using soap water and dry them quickly using a soft cloth or let them air dry. Do not soak any of the components for an extended period as they may damage plastic parts.
- Maintenance Tip: Store each piece thoroughly dried inside a cupboard or on your countertop in an organized fashion for accessibility.
It is notable that proper maintenance revolves around getting separate compartments cleaned precisely. So, this clarifies how separation leads to better handling of each item and encourages clean machinery without clutter buildup.
Pro Tip: Washing each KitchenAid food processor part after every use would help you avoid wastage of money needed for repair expenses or even potential health risks caused when old food residues mix with fresh ones while processing food items next time you use your unclean appliance again!
Keep your fingers intact and the blades sharp by storing your KitchenAid Food Processor properly.
Storing the Food Processor Safely
The proper and secure storage of KitchenAid food processor ensures its durability and prolongs its usability. Here is a guide on how to store the KitchenAid food processor safely:
- Clean the food processor thoroughly after use: It is essential to remove all excess food particles from the blades, discs, and other parts of the appliance.
- Dry the parts appropriately: After cleaning, make sure that all parts of the appliance are entirely dry before storing them. Humidity can cause damage to the electrical components.
- Disassemble the unit: Separate all detachable parts from each other before storing them in their specific places.
- Use protective covers for sharp blades: If possible, use blade covers to prevent accidental cuts.
- Store in a safe place: Keep the food processor away from any direct sunlight or heat sources, water or moisture, and out of reach from children.
It’s important to note that regular maintenance also plays a vital role in keeping your KitchenAid food processor running smoothly. Regularly checking electrical cables for fraying or damage and tightening loose screws on detachable parts can extend the life span of your appliance.
Taking proper care when storing and maintaining your KitchenAid food processor can significantly impact its longevity and performance in future use.
Interestingly, The KitchenAid Company was founded out of necessity during a time when women were seeking new ways to save time in their homes by making kitchen work easier with innovative devices like stand mixers and electric dishwashers.
Putting together a puzzle is easier than assembling a kitchen appliance, but don’t worry, we’ve got you covered with these common assembly solutions.